

I think I've been away from public writing for a bit - but that's mostly for lack of topics on my part as I often think that I don't have many interesting things to say overall.
Nevertheless, the holiday break 2025 gave me time to think. A former colleague had recently approached me about a new project of his: https://social.datenhoheit.eu/@nachrichten.
This got my mind racing a bit: In a world that is seemingly falling apart, where AI and Chat bots dominate technology, where the rich get ever richer and the poor are to fend for themselves under the booming voices of authoritarian-liberal noisemakers craving ever higher profits ... where do I, as a European (& German & Berliner & adopted French person & Spaniard in training) fit in?
I've been talking to many a friend and colleague for a bit about how sovereign we truly are in Europe and how gladly we accept dependency on our American friends and their Tech companies. Heck, I myself work for a company now that has a strong US presence. Where do I even start regaining some independence and ultimately - freedom?
The stack I use
It's though, since convenience is not something that I like to give up easily. Some decisions are easy:
Fuck X, formerly known as Twitter. The Financial Times recently put it better than I ever could.
Messaging and Email are harder. Signal exists and while I trust the overall tech behind it, the servers are in the US. The family is split on WhatsApp and Signal and I remain on Telegram with a couple friends (it's the cute animal stickers I admit).
What about Storage? My git repositories? Photos? Google mostly, as I am an avid Android user from the first days of capable phones being available in Germany. That one's hard. It's mostly Google and I even have a Family account for (mostly) YouTube that's shared. I can already hear the complaints rolling in. Oh sweet Science, I also store most of my personal documents and stuff on Google Drive. Yikes.
Streaming? Thankfully only Netflix, but I do sit on top of about 500 DVDs and Blu-Rays from the good ol' days that ... should probably be backed up and made available somehow on my network to consume via ... damn, a Chromecast.
Paying for stuff. Paypal. Ridiculously convenient, yet founded by an actual Antihumanist insane person in my view. And co-opted by an actual Nazi. Yikes. I don't like those. I don't like those at all.
Browsing? Firefox for personal, Chrome for Work stuff. I adore Mozilla, but I find recent statements to be highly problematic. I tried it. I wanted to see if it helps - and it just doesn't. AI Browsers feel quirky at best, actively malicious at worst. As a consumer, I am happy that even Dell realizes that shoving AI down the consumer's throats might be not the right strategy these days.
The stack I want
... doesn't exist yet. But you gotta start somewhere, seeing that getting potentially cut off might just be the ultimate punishment. Since I personally love me some freedom, I think its time to make things happen.
If you read this far - thanks! The rest of the article will be concerned with how I combined the means of AI, some old components with the gospel of our Lord and Savior Tailscale(, who are an American company... damn) to create a simple home lab server.
You can do that as well! It's never been easier and the best time to start was basically yesterday!
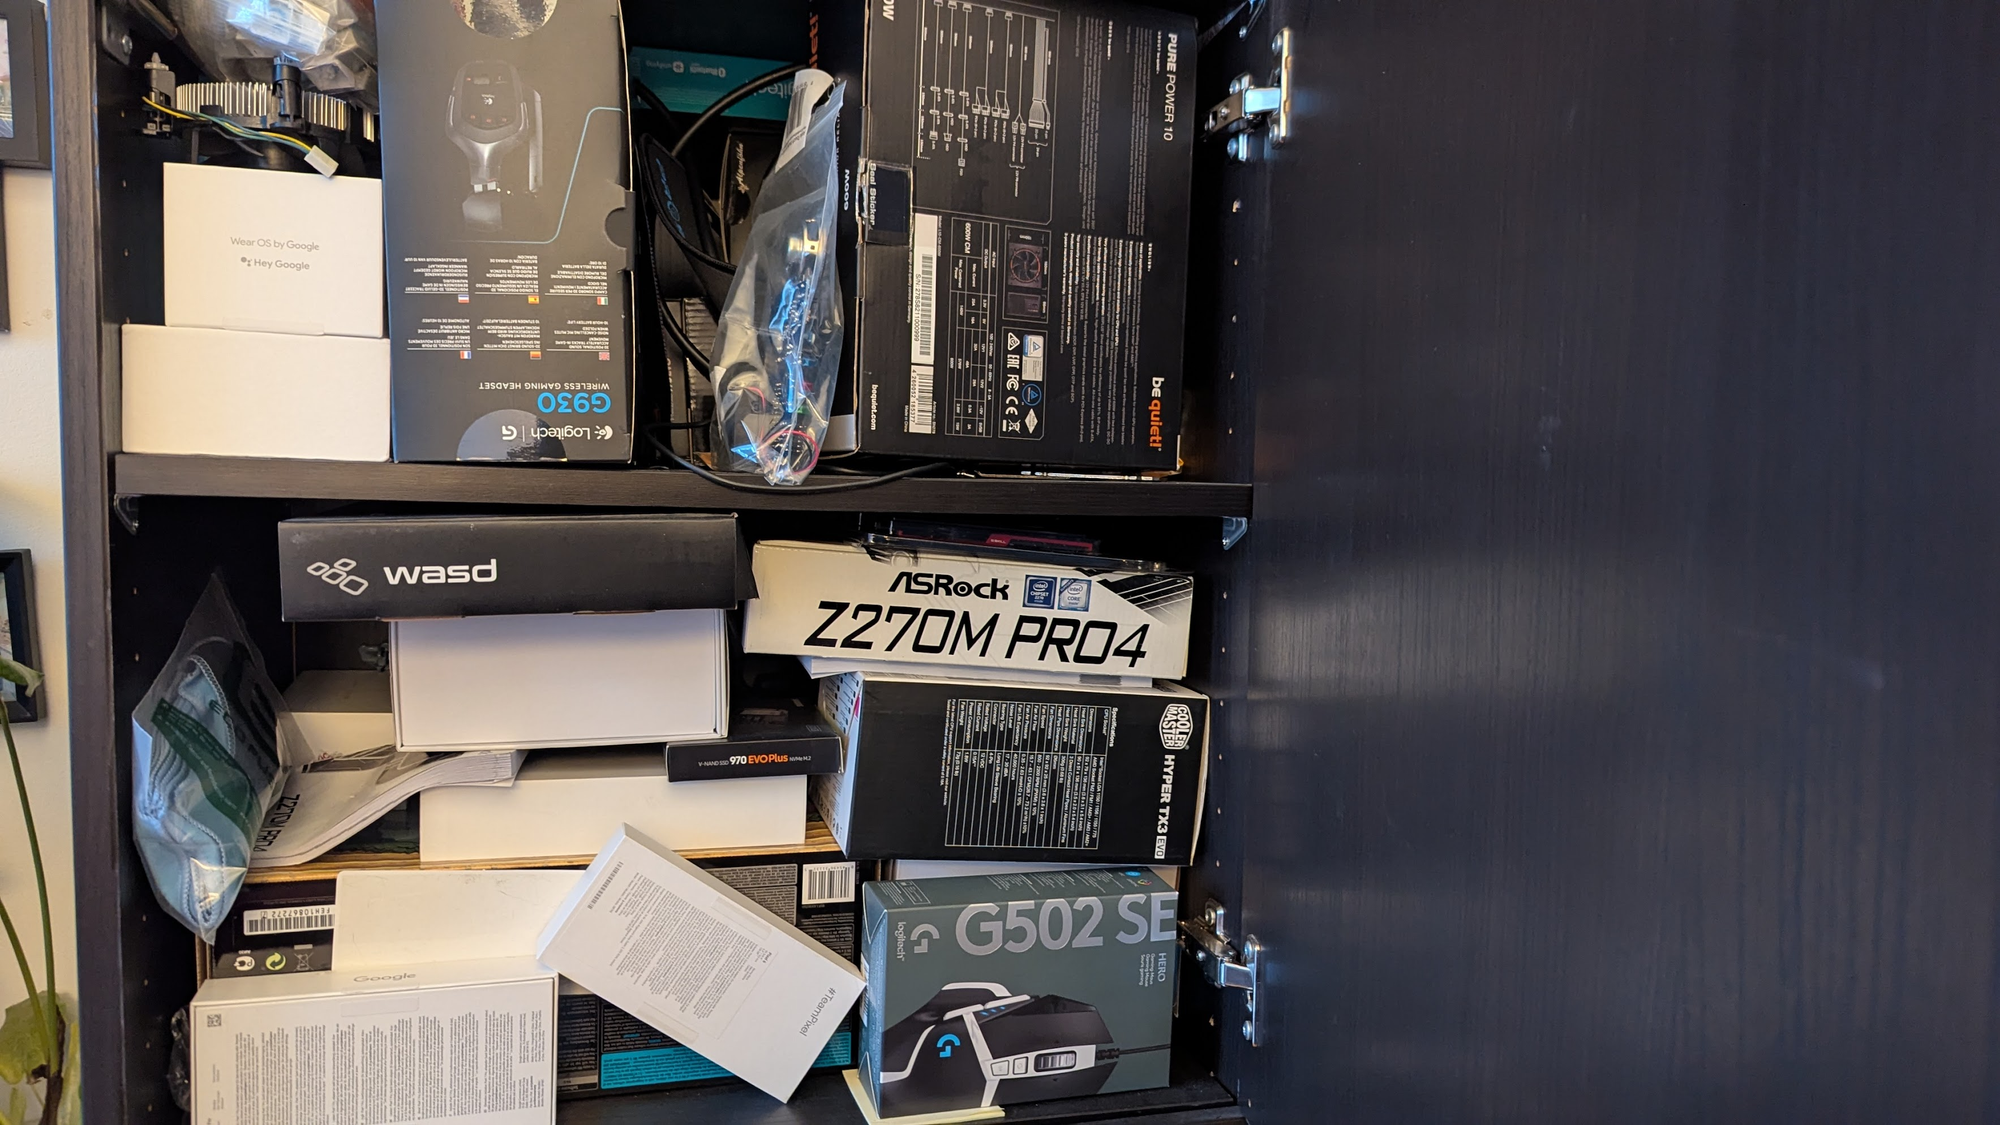
The stuff I have
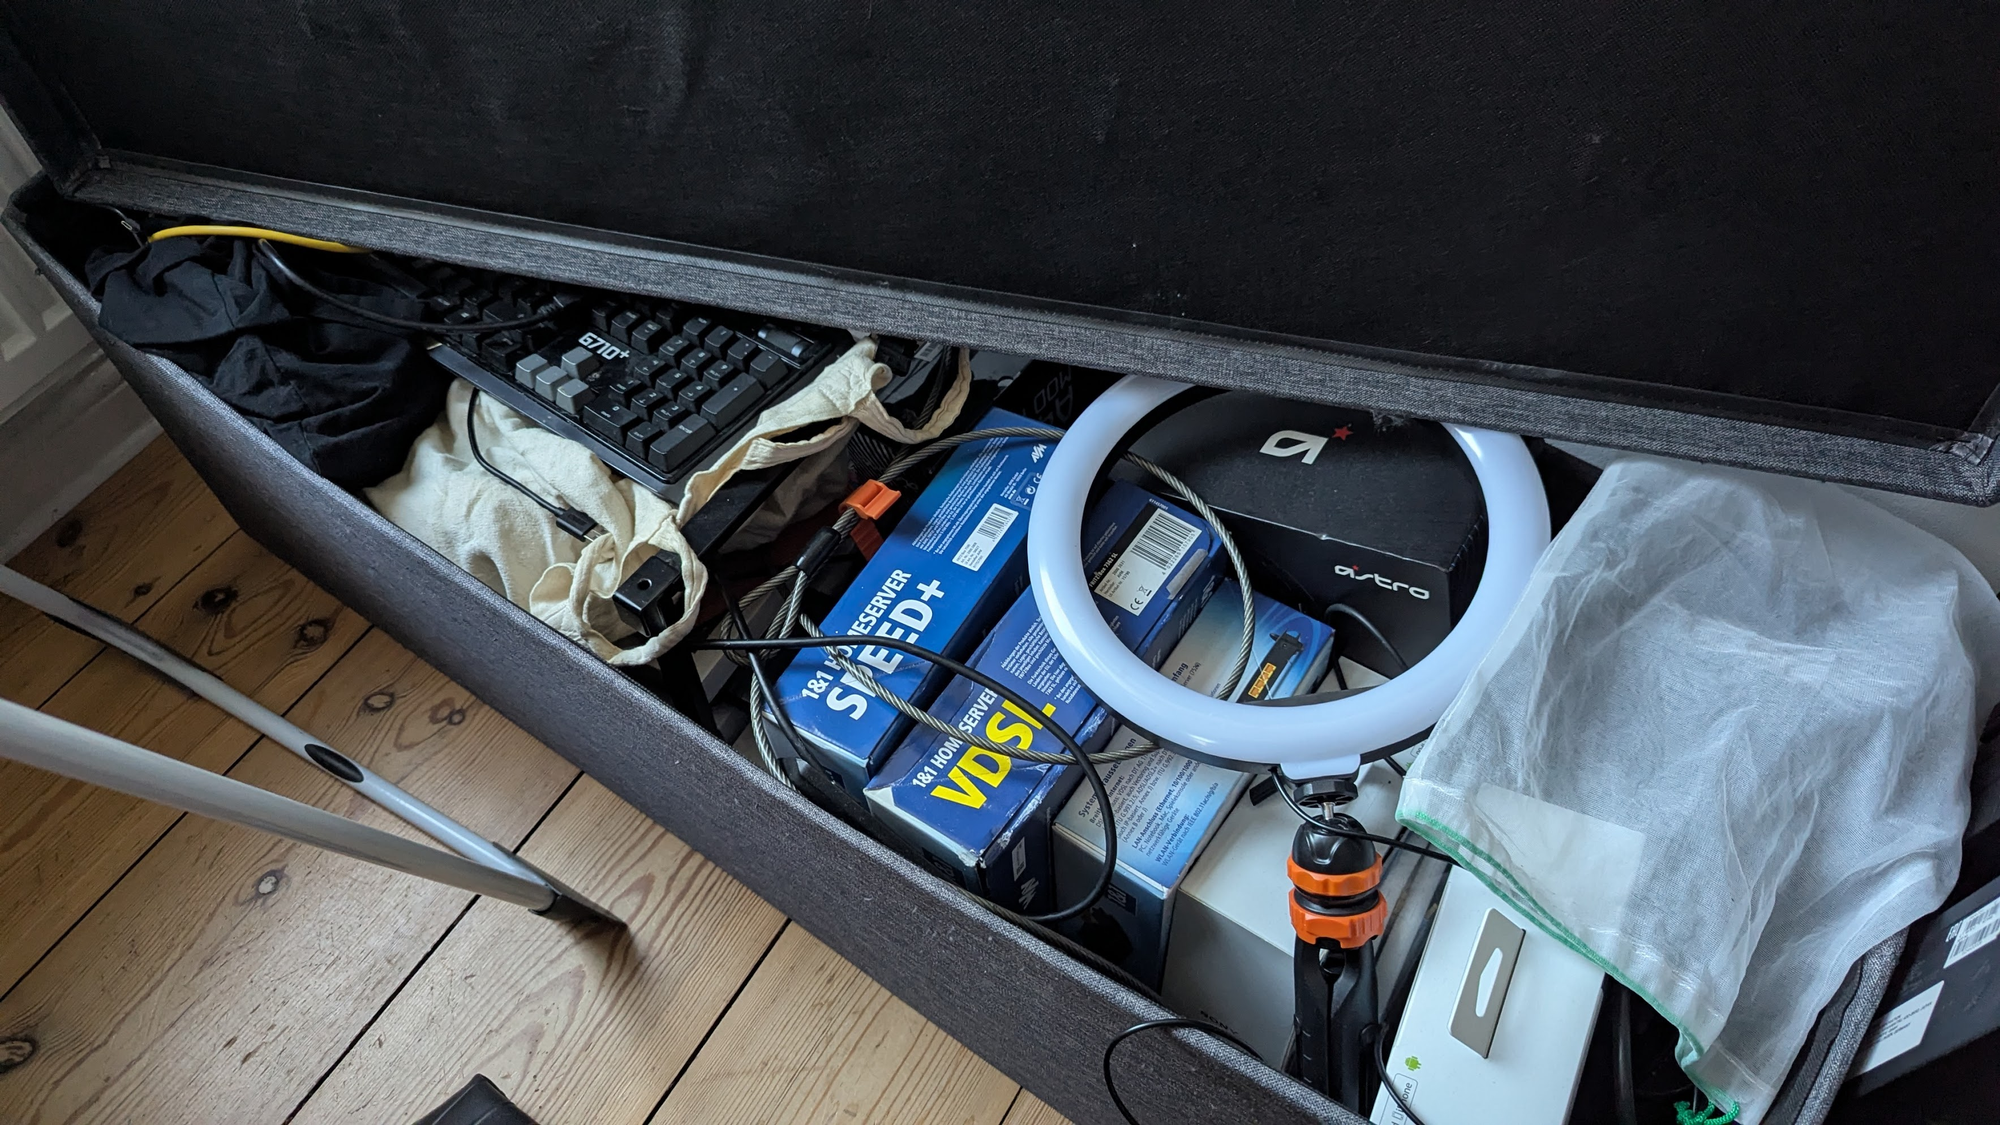
Turns out, years and years of keeping cables, old hardware, keyboards, monitors and such finally pays off! Take that, societal expectations of leading an orderly life!
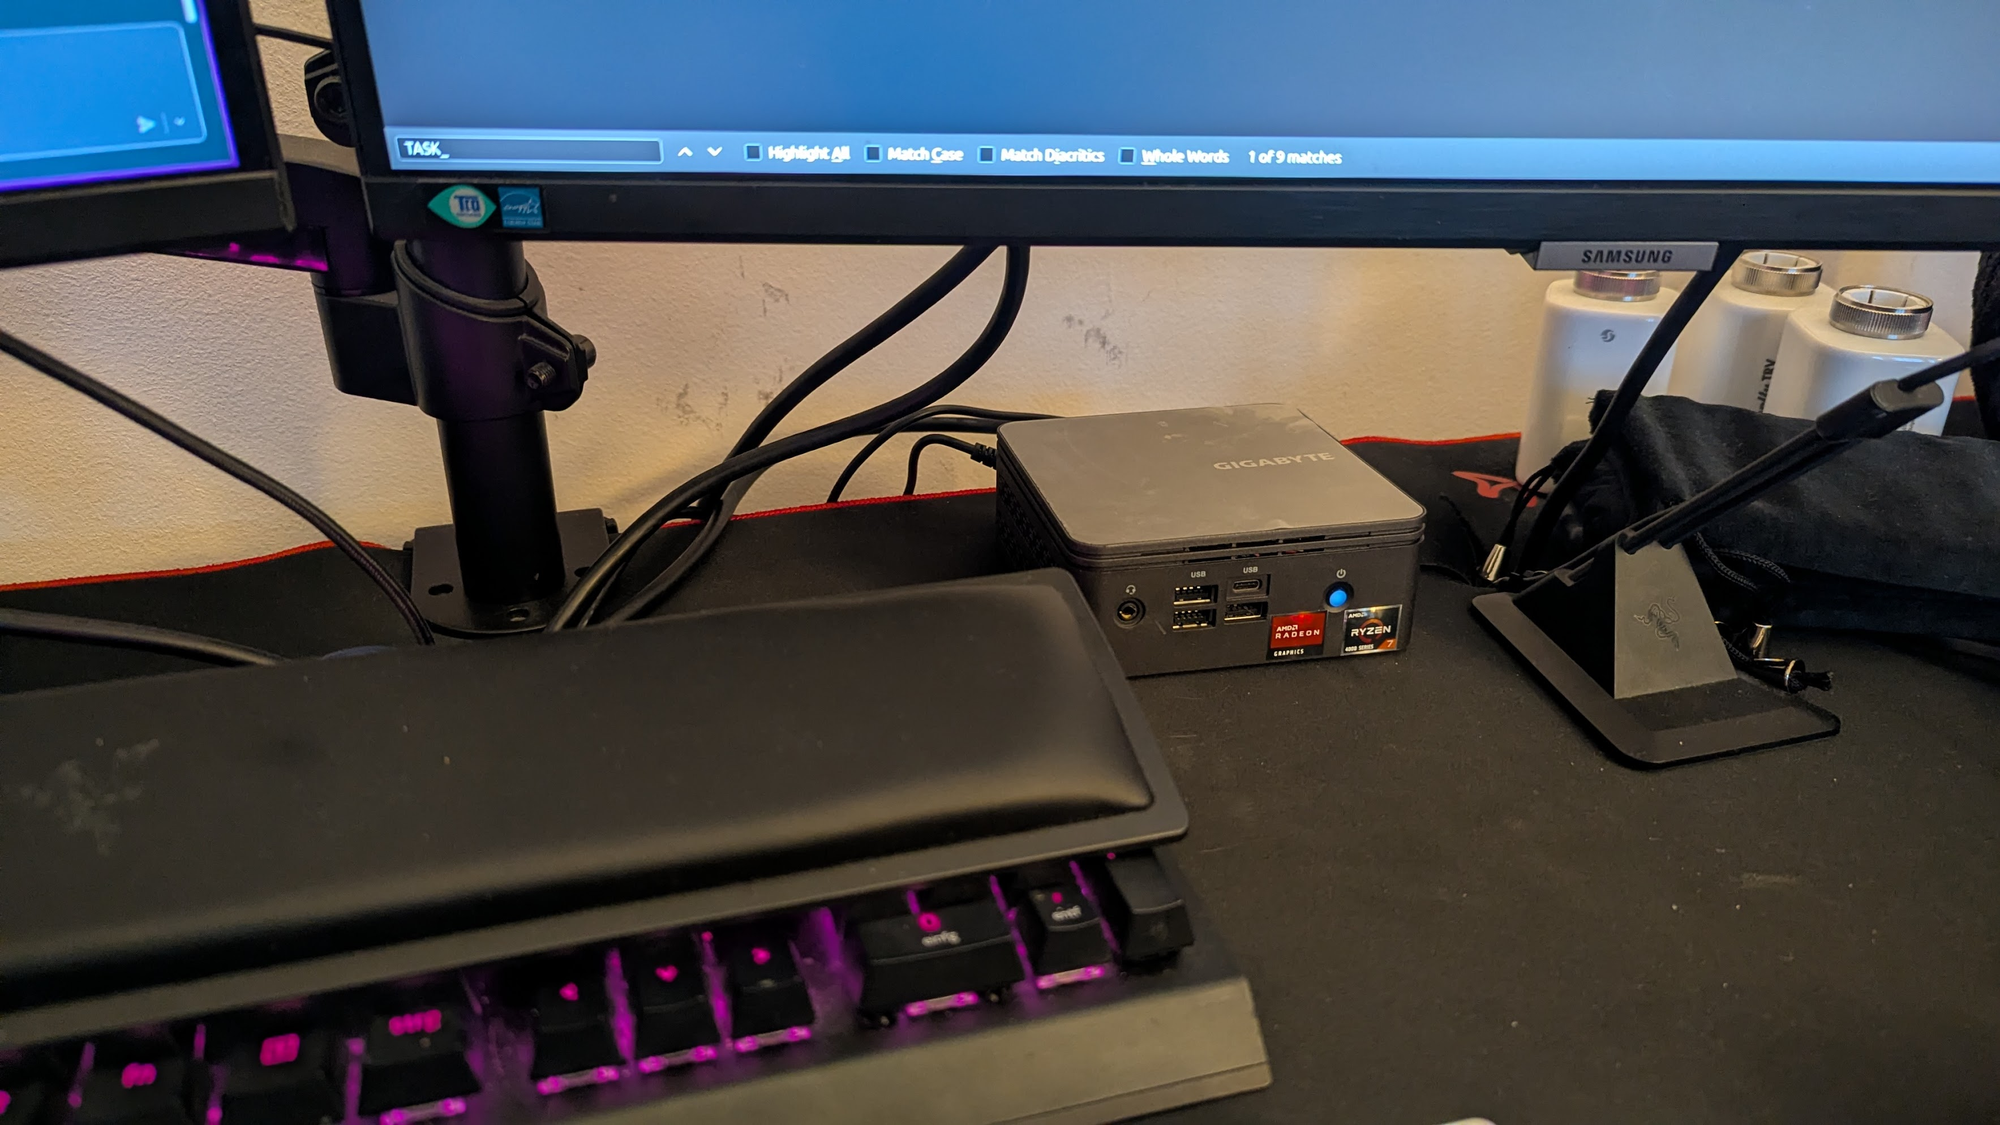
Well, luckily enough I found an old NUC. An old Gigabyte Brix GB-BRR7H-4800 Barebone that I bought years ago in a fit of trying to have a Linux Workstation at home while still keeping my Windows Gaming Machine. As I completely abandoned Windows in 2023 and became a Linux Gamer™️, the NUC went into storage.
Now - you can use any old computer, I'd advocate for "the shittier, the better", since the goal here is not to have a highly optimized machine where you can run Enterprise grade software on. The idea is to start small and reuse old components. I've also considered using an old laptop (a 2014 TuxedoBook actually), but the processor in that one was a bit too old in the end and it didn't neatly fit on my desk.
Whatever you use, FOSS can likely make it work for you.
Baby steps
I am rather simple when it comes to my taste in Linux. Ubuntu Server and that's about it. I even use snap for some things on my current machine and I am prepared to go to FOSS hell for it and I am pretty sure the NixOS people will find me one day.
You can download Ubuntu Server here. I always recommend LTS (Long term support). It also comes preinstalled with OpenSSH.
Create a startup disk
This should be straightforward. Since I also use Ubuntu for my regular Desktop, I can use Startup Disk creator:
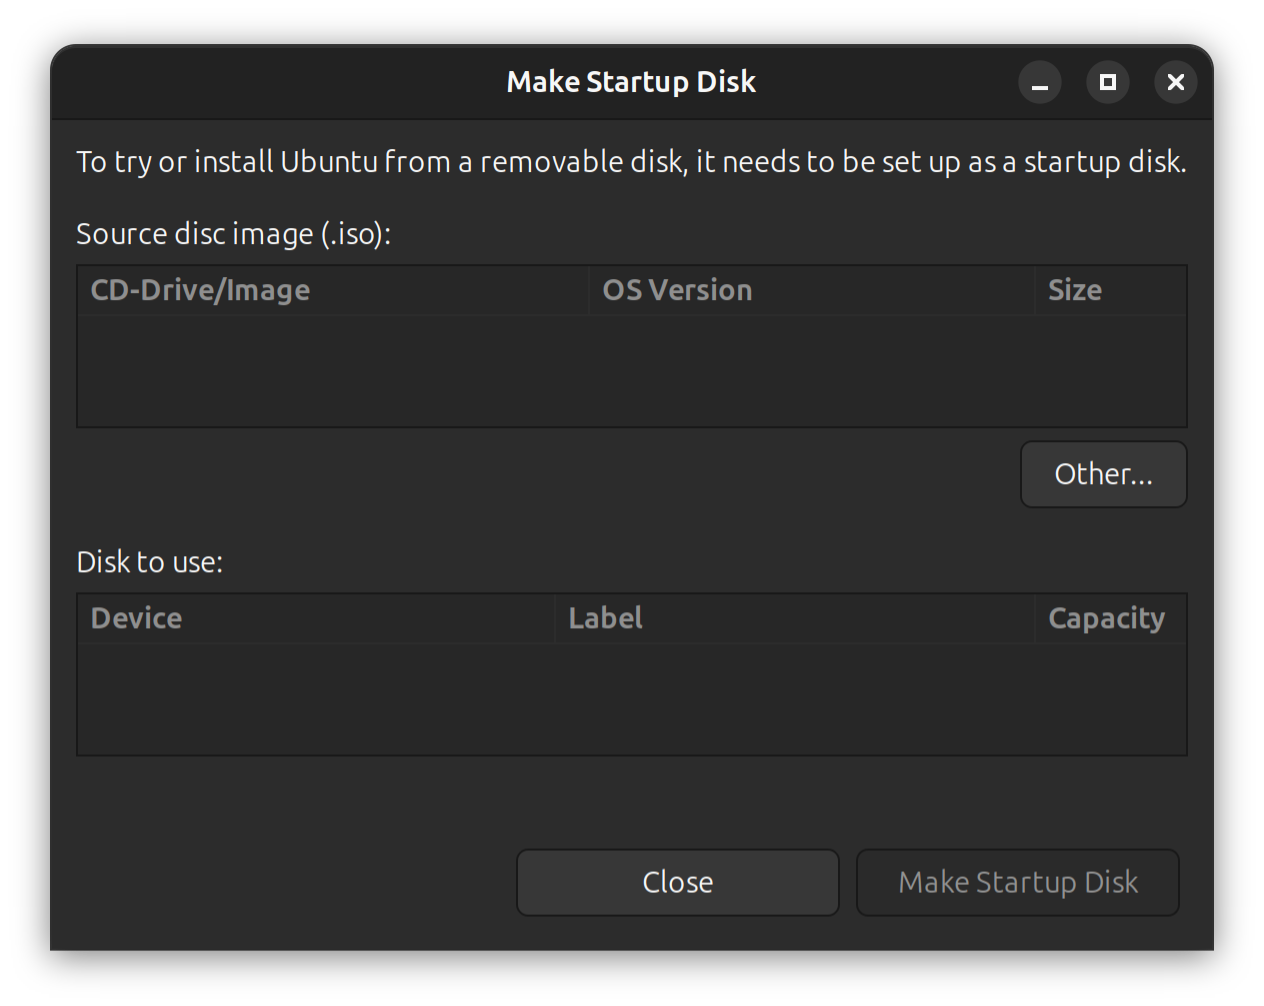
For other OSes, alternatives are available: Ubuntu itself recommends using etcher, which is available for all platforms.
Make sure to grab a keyboard and a monitor (I recommend lending one from you regular computer, you won't need it again unless you reboot, which as the true Linux System Administrator you're about to become, would be a sign of weakness and a violation of the gospel of uptime).
Artificial intelligence and you
I actually used the help of an LLM quite a bit and I can recommend you do the same, as long as you can still understand what's going on. I usually tend to ask for step by step instructions with the LLM running on my client with most skills disabled. I recommend letting it write a summary down in a MarkDown file regularly.
In general, most things we do here are pretty straight forward, but since we'll be storing important data, I strongly advise against just copy-pasting commands from the LLM into the server console.
Setup the server
The server setup itself is guided and the hardest part is getting there. Seriously, different vendors using different keys to press during Startup. It's usually Enter, F12, F10 or Delete. You want to boot from the stick.
Personally, I chose no extra packages other than Prometheus, since I've some plans in the future. I also installed docker, since deployments are easier (it isn't required, but the example in this post will use docker compose)
Name your child. In my case it has the wonderful name of florian-server as opposed to the regular florian that my desktop uses.
Accessing the box
The setup will ask you for adding the public part of a ssh key pair. In my case I could import from GitHub, but if you don't have an ssh key pair, you can:
$ ssh-keygenon your client and create a fresh key pair. You'll find the file in ~/.ssh/ ending in .pub, usually something like id_ed25519.pub. Once the server reboots, you can access is from your client via
$ ssh <user>@<server-name>That is - if you're super lazy like me, add yourself a nice ~/.ssh/config:
Host server
    HostName <a nice name>
    User <user>
    IdentityFile ~/.ssh/id_ed25519 # This is your private key
Much nicer to just type ssh server after all.
Tailscale
Now, I didn't know tailscale before this - a friend and colleague recommended it to me. And oh wow, was I not prepared.
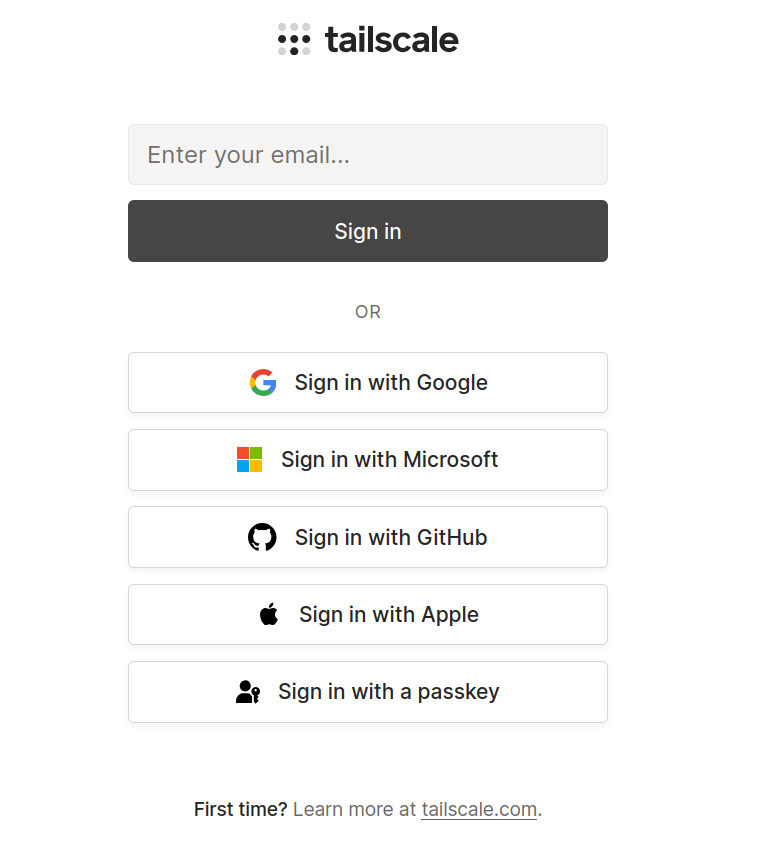
You do need an account and the default seems to be Socials based. Not my personal favorite, but oh well - I will have to switch later but for now I am using one of the social logins.
Tailscale essentially allows you to create a VPN for your stuff with a more friendly interface attached and most sharp edges of doing this completely yourself sanded off for you. Neat (since I personally have very little recent experience in networking, this is saving me hours).
In the end, you can add tailscale to both your machines:
# I formally disapprove of piping a script from the web into sh
florian@florian-server:~ curl -fsSL https://tailscale.com/install.sh | sh
florian@florian-server:~ tailscale up

# and

florian@florian:~ curl -fsSL https://tailscale.com/install.sh | sh
florian@florian:~ tailscale up
And you're essentially there! Tailscale gives you a shared network for these machines and you can start shaping and gating traffic using its ACLs and tagging systems. All of this is just a bunch of basic JSON, which is easy to work with.
In my setup, I traffic just a little internally:
{
  "acls": [
    {
      "action": "accept",
      "src": [
        "tag:client"
      ],
      "dst": [
        "florian-server:22",
        "florian-server:443",
        "florian-server:53"
      ]
    }
  ]
}
Simple ACL is simple, OpenSSH, HTTPS and DNS are open
The above basically means that clients are allowed to connect to the server on three sets of ports: OpenSSH, HTTPS and DNS.
What do I install?
Well, for me, since I wanted to start with paperless, a document management system, since I want to migrate my documents off Google Drive.
This opens up a bunch of questions:
- Who needs access? (In my case, my partner with their two machines)
- Is the paperless instance visible publicly or just in my network? (The answer for me is no, it should only be visible internally)
- How do I even reach the instance - where do I get a fancy name? (In my case, I decided on a pretty cool domain name)
Installing paperless
This one is straight forward, we're running it via docker compose with a docker-compose.yml, an .env file with an extra user.
Installing docker is pretty straight forward on Ubuntu Server.
For the rest:
# add a paperless user
server:$ sudo useradd -r -m -d /srv/paperless -s /usr/sbin/nologin paperless

# create the folders necessary
server:$ sudo mkdir -p /srv/paperless/{data,media,export,consume,db,redis,scripts}

# and declare ownership
server:$ sudo chown -R paperless:paperless /srv/paperless

# add the docker group for the user
sudo usermod -aG docker paperless
These commands are where using an LLM shines, as for the life of me I cannot remember the arguments most of the time.
We'll place a docker-compose.yml in /srv/paperless/docker-compose.yml with the following content:
services:
  db:
    image: postgres:15
    container_name: paperless-db
    environment:
      POSTGRES_DB: ${PAPERLESS_DB_NAME}
      POSTGRES_USER: ${PAPERLESS_DB_USER}
      POSTGRES_PASSWORD: ${PAPERLESS_DB_PASSWORD}
    volumes:
      - ${PAPERLESS_DB_DATA_DIR}:/var/lib/postgresql/data
    restart: unless-stopped

  redis:
    image: redis:7
    container_name: paperless-redis
    volumes:
      - ${PAPERLESS_REDIS_DATA_DIR}:/data
    restart: unless-stopped

  paperless:
    image: ghcr.io/paperless-ngx/paperless-ngx:2.20.3
    container_name: paperless
    depends_on:
      - db
      - redis
    ports:
      - "0.0.0.0:8000:8000"
    environment:
      PAPERLESS_REDIS: redis://redis:6379
      PAPERLESS_DBHOST: db
      PAPERLESS_DBNAME: ${PAPERLESS_DB_NAME}
      PAPERLESS_DBUSER: ${PAPERLESS_DB_USER}
      PAPERLESS_DBPASS: ${PAPERLESS_DB_PASSWORD}
      PAPERLESS_ADMIN_USER: ${PAPERLESS_ADMIN_USER}
      PAPERLESS_ADMIN_PASSWORD: ${PAPERLESS_ADMIN_PASSWORD}
      PAPERLESS_ADMIN_MAIL: ${PAPERLESS_ADMIN_MAIL}
      PAPERLESS_TIME_ZONE: ${PAPERLESS_TIME_ZONE}
      PAPERLESS_OCR_LANGUAGE: ${PAPERLESS_OCR_LANGUAGE}
      PAPERLESS_CONSUMER_RECURSIVE: "true"
      PAPERLESS_CONSUMER_POLLING: "5"
      PAPERLESS_URL: ${PAPERLESS_URL}
      USERMAP_UID: ${PAPERLESS_UID}
      USERMAP_GID: ${PAPERLESS_GID}
      PAPERLESS_OCR_MAX_IMAGE_PIXELS: ${PAPERLESS_OCR_MAX_IMAGE_PIXELS}
      PAPERLESS_WORKER_TIMEOUT: ${PAPERLESS_WORKER_TIMEOUT}
      PAPERLESS_TASK_WORKERS: ${PAPERLESS_TASK_WORKERS}
    volumes:
      - ${PAPERLESS_DATA_DIR}:/usr/src/paperless/data
      - ${PAPERLESS_MEDIA_DIR}:/usr/src/paperless/media
      - ${PAPERLESS_EXPORT_DIR}:/usr/src/paperless/export
      - ${PAPERLESS_CONSUME_DIR}:/usr/src/paperless/consume
    restart: unless-stopped
Binding to 0.0.0.0 is important here - a thing that normally costs me hours to notice. I've lost countless hours to binding to 127.0.0.1 instead. I don't recommend using latest here, but it's what the LLM used insisted on - I've corrected it in the example.
docker compose here, which usually runs as root. One way to harden this setup is to either use podman or looking into rootless docker.The values for .env go into /srv/paperless/.env and they will get picked up automatically on startup. Example:
PAPERLESS_DB_NAME=paperless
PAPERLESS_DB_USER=paperless
PAPERLESS_DB_PASSWORD=<strong password>

PAPERLESS_ADMIN_USER=admin
PAPERLESS_ADMIN_PASSWORD=<strong password>
PAPERLESS_ADMIN_MAIL=<your email>

PAPERLESS_TIME_ZONE=Europe/Berlin
PAPERLESS_OCR_LANGUAGE=<your OCR languages, multiple look like deu+fra+eng>
PAPERLESS_URL=<the URL you want, e.g. https://mydocs.internal.net

PAPERLESS_UID=<id -u paperless>
PAPERLESS_GID=<id -g paperless>

PAPERLESS_DB_DATA_DIR=/srv/paperless/db
PAPERLESS_REDIS_DATA_DIR=/srv/paperless/redis
PAPERLESS_DATA_DIR=/srv/paperless/data
PAPERLESS_MEDIA_DIR=/srv/paperless/media
PAPERLESS_EXPORT_DIR=/srv/paperless/export
PAPERLESS_CONSUME_DIR=/srv/paperless/consume

# I recommend upping this, as the default is 1.
PAPERLESS_TASK_WORKERS=4
Making sure it runs on startup
Add the following a paperless.service to /etc/systemd/system/paperless.service:
[Service]
Type=oneshot
RemainAfterExit=yes
User=paperless
Group=paperless
WorkingDirectory=/srv/paperless

ExecStart=/usr/bin/docker compose up -d
ExecReload=/usr/bin/docker compose up -d
ExecStop=/usr/bin/docker compose down
TimeoutStartSec=0
And reload:
server:$ sudo systemctl daemon-reload
server:$ sudo systemctl enable --now paperless.service
Congratulations - you should have a running instance on :8000 - you can verify via curl.
Internal DNS split
This one was the actual nail biter for me - and I am kinda glad that LLMs helped me debug this a lot: I wanted to internally access my documents under https;//docs.internal.net, which stumped me a bit.
The concept here is that Tailscale can, for certain names, use a custom DNS server instead of its own MagicDNS. But that means we gotta run us some DNS:
server:$ sudo apt install -y dnsmasqThen I added a new configuration to resolve exactly one name in /etc/dnsmasq.d/my-conf.conf:
interface=tailscale0
listen-address=100.x.y.z # This is the tailscale ip of the server you're on
bind-interfaces
address=/docs.internal.net/100.x.y.z # Again, paperless runs here too

# Additional DNS servers
# https://www.joindns4.eu/for-public
server=86.54.11.1
With a quick sudo systemctl reload dnsmasq we have a minimal DNS running. On the Tailscale Admin console, we can now config SplitDNS for our domain name:
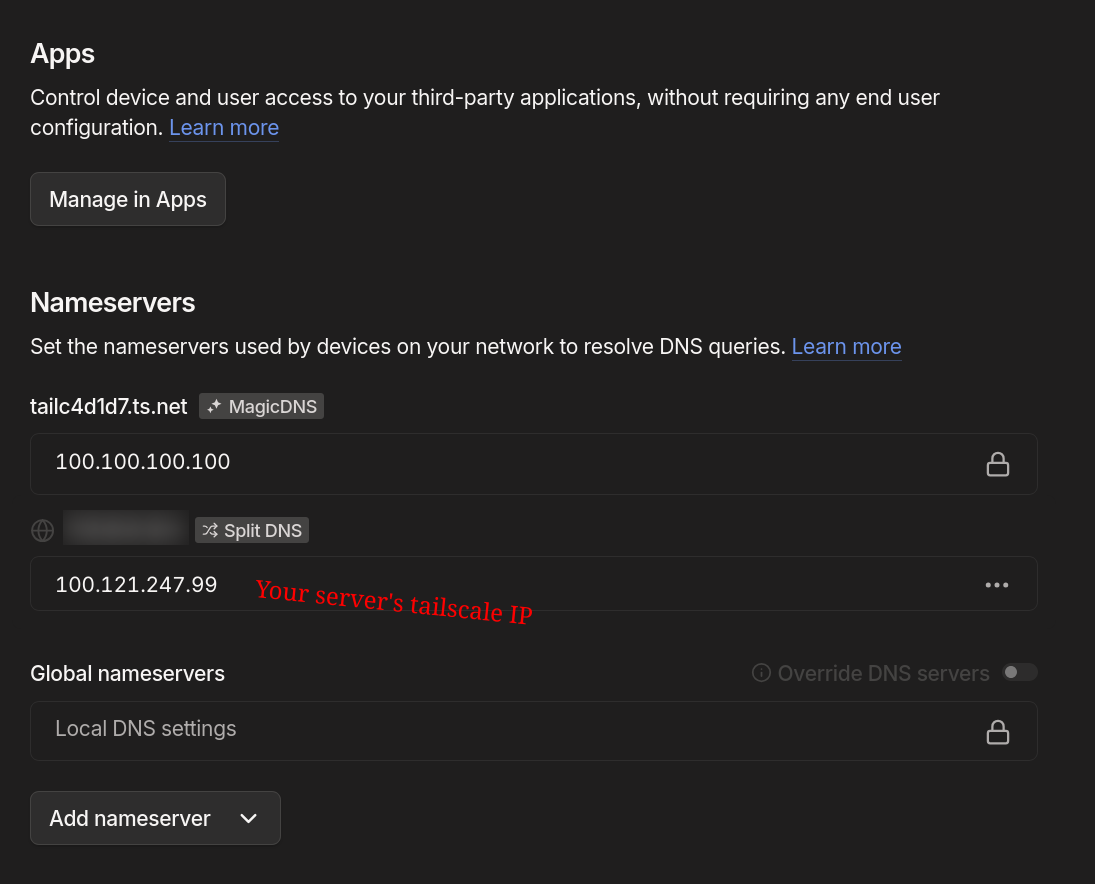
Adding this is a tad awkward since you're adding a new nameserver (my LLM buddy insisted on clicking the "split DNS button" here, which marked a low point in our relationship.
What does this mean? Well, for some names on your network, all devices that are part of it will look up the name on our home lab first, running a dnsmasq with exactly one name: docs.internal.net, which will resolve to itself, as it's also running the paperless instance.
So, you could, from here on out just go to https://docs.internal.net and find the paperless instance? Nope, since SSL is its own beast to deal with?
Reverse Proxying and certificates
This is where security gets a bit complicated. Our paperless instance is now running on server:8000, but doesn't actually resolve SSL for us. So when trying to reach the address we just get an error. And adding :8000 to any address in production is rather unsightly.
caddy and custom certificates
Let's install a reverse-proxy:
server:$ sudo apt install -y caddyand add a /etc/caddy/Caddyfile:
docs.internal.net {
  tls internal
  reverse_proxy 127.0.0.1:8000 # paperless is running here
}
reloading caddy via
server:$ sudo systemctl reload caddy... and we're done.
Or not, since reverse proxying now works and SSL is terminated correctly by caddy, but there is a snowball's chance in hell that your browser trust's that internal certificate by default.
Two options: Private DNS zones, but you'd need a DNS provider - or distributing a custom cert to all clients that uses your internal network.
For the six devices that I am running internally, I decided on option 2:
# The caddy internal cert is here
server:$ ll /var/lib/caddy/.local/share/caddy/pki/authorities/local/root.crt

# copied it manually via scp to my machine
florian:$ sudo cp root.crt /usr/local/share/ca-certificates/caddy-root.crt
florian:$ sudo update-ca-certificates
Two small issues:
- Firefox Nightly on my machine uses it's own cert store, because I use
snapfor Firefox; you can find the custom store in the settings under Certificates - I made a copy paste error chasing and comparing fingerprints for hours, due a missing
-in the cert header. All that time saved by the LLMs, gone in an instant (with the instant being a good hour)
In any case, once the cert is installed, you should be able to reach your internal instance from your network - the downside being that adding devices requires the certificate. In my case a small price, but I'd look for option 1 with a private DNS zone through a provider should your network be bigger.
acme.sh. This also required me moving DNS servers, which is a whole different nightmare.Backups
Using internal storage is all fun and games until some catastrophic disk failure ruins your day.
I decided to actually reuse my Google Drive here and the recommendation is to use rclone, which ships with several adapters:
server:$ sudo apt install -y rcloneConfigure rclone as the paperless user
sudo -u paperless -H rclone configCreate two new remotes:
gdrive(Google Drive, scope drive)gdrive-crypt(typecrypt, remote = gdrive:paperless)
Pick strong password + salt for the crypt remote.
This was honestly a bit confusing, since you have to setup two remotes for one backup. The configuration terminal interface is super friendly, so I had an easy time configuring and reconfiguring.
Create the backup script
In /srv/paperless/scripts/backup-paperless.sh create a new script - again, LLMs are taking on a lot of legwork here:
#!/usr/bin/env bash
set -euo pipefail
BACKUP_ROOT="/srv/paperless"
DUMP_DIR="${BACKUP_ROOT}/export/db"
DUMP_FILE="${DUMP_DIR}/paperless-$(date +%F-%H%M%S).sql.gz"
mkdir -p "${DUMP_DIR}"
# Load DB credentials
set -a
. /srv/paperless/.env
set +a
# Dump DB from the container
docker exec -i -u postgres -e PGPASSWORD="${PAPERLESS_DB_PASSWORD}"
paperless-db pg_dump -U "${PAPERLESS_DB_USER}" "${PAPERLESS_DB_NAME}" | gzip > "${DUMP_FILE}"

# Keep last 5 dumps locally
ls -1t "${DUMP_DIR}"/paperless-*.sql.gz | tail -n +5 | xargs -r rm -f

# Encrypted sync to Drive (exclude raw DB dir)
rclone sync "${BACKUP_ROOT}" gdrive-crypt:paperless
--exclude "/db/**"
--create-empty-src-dirs
--transfers 4
--checkers 8
--log-level INFO
Make it executable:
server:$ sudo chmod +x /srv/paperless/scripts/backup-paperless.sh
server:$ sudo chown -R paperless:paperless /srv/paperless/scripts
You can manually test the script before creating the service and the timers:
server:$ sudo -u paperless -H bash /srv/paperless/scripts/backup-paperless.shAdd a systemd timer (daily)
In /etc/systemd/system/paperless-backup.service:
[Unit]
Description=Paperless backup to Google Drive (rclone)
Wants=network-online.target
After=network-online.target

[Service]
Type=oneshot
User=paperless
Group=paperless
WorkingDirectory=/srv/paperless
ExecStart=/srv/paperless/scripts/backup-paperless.sh
... and in /etc/systemd/system/paperless-backup.timer :
[Unit]
Description=Run Paperless backup daily
[Timer]
OnCalendar=daily
Persistent=true
[Install]
WantedBy=timers.target
Enable:
server:$ sudo systemctl enable --now paperless-backup.timer
server:$ sudo systemctl daemon-reload
... and you're done!
And so am I - I've now a fully functional paperless instance running on my own hardware in front of me - and I am running an encrypted backup against Google Drive. There are more options here and I am planning to ultimately move to a Hetzner Bucket with the data (which is S3 compatible).
Additionally, I also set up a local backup against a physical drive - in my case a small USB key that is just permanently plugged into the server. I am using restic for that one though.
Conclusions
This was a ton of fun and I was surprised how well this actually worked. I've also used LLMs as a sort of highly specialized Search Engine, effectively a StackOverflow on steroids.
It was quite a bit of fun and I learned a lot - in the end it also shows how much work the services that I use actually take out of my hands. FOSS alternatives are there, but they require a good amount of configuration and customization.
I like the flexibility a lot and I will continue to work on the setup - I have other projects that can be run on the home lab. In the end it will take a while for software to catch up and I hope that the countries in the European Union do wake up in terms of sovereignty of data and software.